Quick answer: Build a flat, securely anchored panel wide enough to catch likely misses, then mount the board so its face remains at the correct measured distance.
Plan coverage and clearance
Use a panel wider than the board in every direction, with extra coverage for beginners. Keep doors, switches, windows, furniture, and walkways outside the miss and rebound zone. Map the protected rectangle on the wall with removable tape and simulate likely misses. More lateral and lower coverage may be useful for beginners than a narrow decorative halo.
Apply this point specifically to build dartboard backboard: Map the protected rectangle on the wall with removable tape and simulate likely misses. More lateral and lower coverage may be useful for beginners than a narrow decorative halo. Before deciding, compare the actual component with the room and the people who will use it. Record the relevant measurement or condition instead of relying on memory after installation.
This is also where material type matters. Sisal, electronic plastic, and magnetic construction respond differently to impact, cleaning, storage, and modification. Keep the recommendation attached to the exact board rather than generalizing it to every dart target.
Choose a catch surface
Dense purpose-made backboard, layered wood with replaceable face material, or commercial surround panels can work. Avoid brittle sheet, exposed hard metal, and materials that shed hazardous fragments. Layered construction can combine a structural panel with a replaceable sacrificial face. The assembly must not expose hard fasteners that cause rebounds or hidden voids that let points reach the wall.
Layered construction can combine a structural panel with a replaceable sacrificial face. The assembly must not expose hard fasteners that cause rebounds or hidden voids that let points reach the wall. In practical terms, the choose a catch surface check should happen before appearance or bonus features influence the decision. A seller's label is useful only when the construction, instructions, and physical setup support it.
Document the decision with a measurement, dated photo, manual reference, or parts list when appropriate. That small record makes later maintenance and troubleshooting more reliable and helps another household member preserve the intended setup.
Build and anchor the assembly
Locate framing and use fasteners rated for the combined panel, board, and removal forces. Smooth edges, secure every layer, and keep fastener heads away from probable impacts. Use a detector and available building plans to reduce the risk of drilling into wiring or plumbing. When wall construction is unknown, stop and obtain qualified help rather than guessing.
For build dartboard backboard, this distinction prevents a common category error. Use a detector and available building plans to reduce the risk of drilling into wiring or plumbing. When wall construction is unknown, stop and obtain qualified help rather than guessing. Inspect the exact product or project at hand, because a rule that suits sisal may be wrong for a sensor board, flexible target, or specialty layout.
Stop if the board becomes unstable, the lane cannot be isolated, a component is damaged, or the instructions conflict with the planned method. Performance never justifies uncertain anchoring, incompatible darts, exposed electrical parts, or a hidden ingestion hazard.
Mount and verify
Install the board on its designed center bracket, level it, stabilize it, then measure the bull and oche from the finished board face. Tug-test safely before throwing. After installation, inspect the rear wall and edges following the first sessions. Penetration marks reveal whether the selected material and coverage are actually adequate for the users.
After installation, inspect the rear wall and edges following the first sessions. Penetration marks reveal whether the selected material and coverage are actually adequate for the users. Turn that fact into a repeatable check: observe the condition, verify the maker's instructions, make one controlled change, and reassess. That approach is safer than improvising several fixes and losing track of the cause.
A useful result should be visible in safer installation, more dependable scoring, or slower wear—not merely a neater description. If the mount and verify requirement cannot be verified, pause the purchase or project until the missing specification is available.
Current equipment to compare
Use these verified listings as a starting set, then confirm the selected variation, dimensions, compatibility and current order terms on the retailer page. Inclusion is not a claim of hands-on testing or a universal ranking.
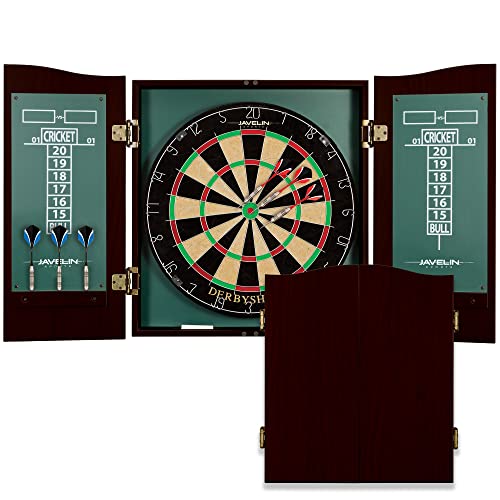
EastPoint Derbyshire Official Size Dart Board Cabinet, 6 Steel Tip Darts
Check availability on Amazon ↗Paid link · #CommissionsEarned
Accudart Armada Bristle Dartboard Cabinet Set, 18-Inch
Check availability on Amazon ↗Paid link · #CommissionsEarned
As an Amazon Associate, we earn from qualifying purchases. Product links are paid links; availability can change.
Turn the answer into a better game
Use the relevant tool or playing guide next instead of leaving the answer on the screen. You can play the Road to the Crown darts game, measure a lane with the setup calculator, or return to our dart boards homepage to compare board types and plan a complete setup.
Frequently asked questions
Is cork tile enough?
Thin tile may not stop a steel point; test thickness and wall protection before use.
Can adhesive hold it?
Do not rely on adhesive unless the product is rated for the full dynamic load and wall surface.
When are anchors needed?
Whenever framing cannot accept every fastener; choose rated anchors appropriate to that wall type.
The Throw Lab verdict
A useful DIY backboard is broad, penetrable without dangerous rebound, firmly anchored, and compatible with the board’s own mount. If wall structure, wiring, or load rating is uncertain, use a stand or hire an installer. Recheck regulation measurements only after the full assembly is secure. Recheck the exact board manual and the rules used by the intended players whenever either could change the recommendation.